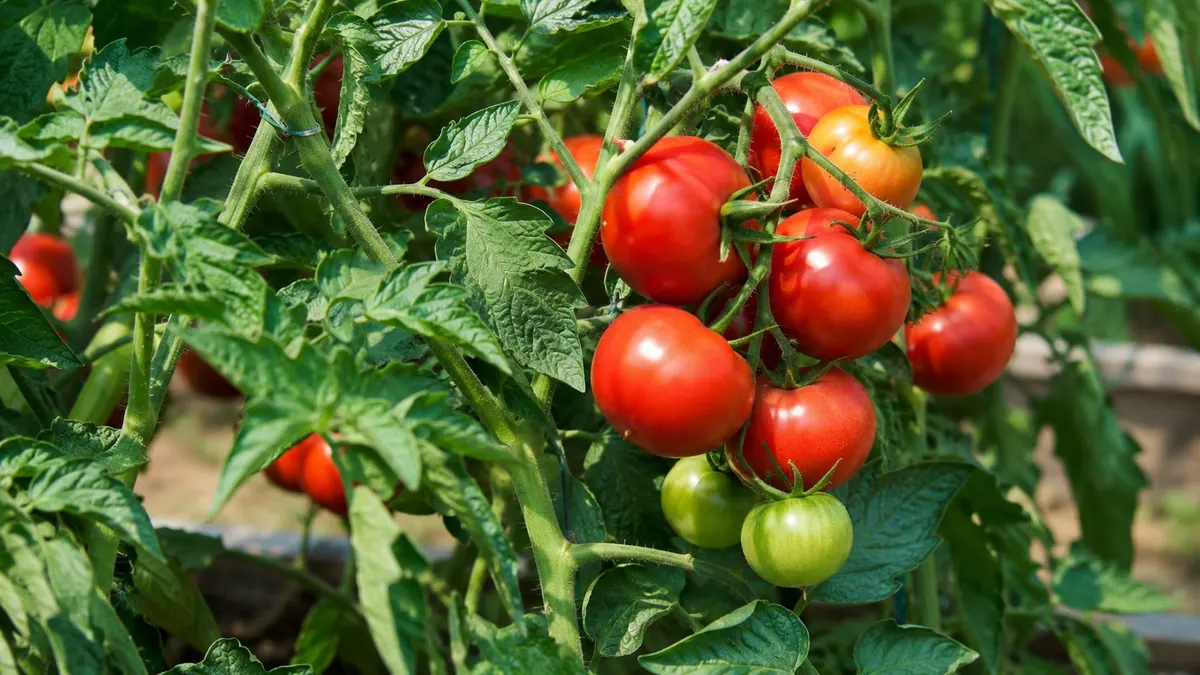
Zone 7 is one of the friendliest places in the country to start a vegetable garden. Winters are cold enough to grow real cool-season crops, but not so cold that spring is painfully short. Summers are long enough for tomatoes, peppers, cucumbers, beans, squash, melons, basil, and a second round of fall greens. In a normal year, many Zone 7 gardeners can work with a 7- to 8-month growing season if they use frost protection and plant in waves.
That long season is a gift, but it also tempts new gardeners into buying too much. You do not need a shed full of gadgets. You need a bed that drains, soil that holds moisture without staying soggy, warm-season crops started at the right time, water that runs when July gets serious, basic frost protection, a few hand tools, and a small pest kit for the problems Zone 7 actually gets.
This is the working stack I would buy for a first productive Zone 7 season, organized by when you need each piece. For local timing, use your ZIP in the Plant by ZIP matcher, then compare the broad Zone 7 patterns here with the Zone 7a planting calendar or Zone 7b planting calendar. Zone 7 on the USDA Plant Hardiness Zone Map means an average annual extreme minimum around 0 to 10 degrees F, but your last frost, first frost, rainfall, humidity, and soil type still matter.
Disclosure: Some product links in this article are affiliate links, which means Plant by ZIP may earn a commission if you buy through them at no extra cost to you.
1. Setting up the bed
Start with one serious bed. Not six beds, not a whole backyard conversion, not a complicated layout you have to maintain before you have harvested a single tomato. A single 4x8 raised bed is enough room for tomatoes, peppers, basil, cucumbers, lettuce, beans, and a fall planting of greens if you use the space well.
The two easiest bed materials are galvanized metal and cedar. A galvanized raised bed kit is usually the best value if you want durability, modular shape, and quick assembly. It warms a little faster in spring and is easy to keep tidy. A cedar raised bed kit looks more traditional, is comfortable to sit on while working, and blends into a field-guide style garden better than metal. Both work. Pick based on budget and appearance, not magical crop claims.
For a first bed, do not dig out the existing lawn unless you enjoy making the project harder. Mow the area low, water it, then put down a kill layer before filling the bed. Recycled cardboard is perfectly good if you remove tape and overlap the seams by several inches. If you are dealing with aggressive weeds or Bermuda grass, use a geotextile landscape fabric under the bed perimeter and paths, not mixed into the soil itself. Roots need to move down. Fabric belongs below paths or under the bed footprint where you are suppressing old turf, not as a layer halfway through the soil.
For fill, think in bulk. Bagged raised-bed soil is convenient but expensive if you are filling a deep bed from empty. If you can get a local bulk raised-bed mix delivered, that is usually the better buy. If bags are the practical route, a raised-bed soil blend is the core fill, and an individual 16-quart potting mix is useful for containers, seedling up-potting, and topping off small gaps. Avoid filling a vegetable bed with straight topsoil, straight compost, or cheap mulch labeled as garden soil. You want mineral soil, compost, and aeration in balance.
Add compost, but do not turn the bed into a compost bin. A few inches mixed into the top layer is plenty. One bag of compost amendment can improve a small bed or refresh an established one. If your bed is brand new and already filled with a high-compost raised-bed blend, save extra compost for side-dressing tomatoes and peppers later.
The tool most Zone 7 beginners skip is also one of the most useful: a soil thermometer. Air temperature lies in March. Soil temperature tells the truth. Tomatoes and beans can sulk in cold soil. Cucumbers and squash can rot before they get moving. A cheap basic soil thermometer is enough, and a digital soil thermometer is nicer if you want quick readings. For warm-season crops, wait until the top few inches of soil are consistently warm, not just one sunny afternoon. Extension planting guides, such as this vegetable planting guide from Colorado State Extension, are useful because they separate cool-season crops from warm-season crops instead of treating spring as one big planting date.
The first-bed shopping list is simple: bed kit, kill layer, soil, compost, thermometer. That is the foundation. Spend money here before you spend it on novelty seeds.
2. Seeds and starts for Zone 7
Zone 7 gives you two different gardens in one year. The spring and fall garden is lettuce, kale, collards, peas, radishes, carrots, broccoli, cauliflower, and herbs that do not mind cool nights. The summer garden is tomatoes, peppers, basil, cucumbers, beans, squash, okra, eggplant, sweet potatoes, and melons.
For a first year, buy starts for the slow warm-season crops and direct-sow the fast ones. Tomato and pepper starts are worth buying locally if you are late, short on indoor space, or still learning. Cucumbers, squash, beans, lettuce, kale, radishes, and basil are easy from seed. A broad vegetable seed variety pack is fine as a starter pantry if you will actually use the packets, but do not let a variety pack choose the whole garden for you.
The best Zone 7 first-season lineup is not exotic. It is reliable. Plant one tomato with fresh-eating and sauce value, such as Amish Paste tomato. Add a jalapeno or lunchbox pepper like Jalapeno pepper. Put Marketmore 76 cucumber on a trellis. Grow Black Beauty zucchini if you have room, or skip squash the first year if squash vine borers are brutal in your area. Use Blue Lake bush bean for easy succession planting. For greens, plant Parris Island romaine lettuce, Lacinato kale, and Snowball cauliflower as cool-season crops, with the brassicas stronger in fall than in summer heat.
If you want to start your own transplants, buy equipment once and keep it boring. A seed-starting tray with a humidity dome is enough for a small garden. An integrated seed-starting kit with dome and lights is cleaner if you do not want to assemble pieces. The dome comes off as soon as most seeds germinate. Leaving seedlings sealed under humidity for too long invites damping-off and weak stems.
A seedling heat mat is worth it for peppers, eggplant, basil, tomatoes, and other warm-season crops. It is not for every seed. Lettuce and many brassicas germinate better cool and can become leggy if you push them with heat. Use the heat mat to get warm-season trays up, then move seedlings under light.
Light is where indoor seed starting succeeds or fails. A sunny window usually makes stretched seedlings. A set of Barrina T5 grow light fixtures mounted a few inches above the seedlings is a better first setup than one fancy lamp that only covers half a tray. Run lights 14 to 16 hours a day, keep them close, and use a timer if you are forgetful.
Timing matters more than equipment. Start peppers earlier than tomatoes. Start tomatoes indoors about 6 to 8 weeks before your last expected frost. Start cucumbers and squash only 3 to 4 weeks before transplanting, or direct-sow them once the soil is warm. Sow beans directly. Sow lettuce and brassicas in early spring and again for fall. In Zone 7, the fall garden is not a consolation prize. It is often cleaner, cooler, and less stressful than July.
3. Water for one 4x8 bed
Zone 7 summers can be generous, humid, and rainy, but they can also go dry right when tomatoes and cucumbers need steady moisture. Hand-watering works for the first week because you are excited. By July, it becomes the chore that gets skipped. A simple drip setup is one of the best upgrades you can make in year one.
For one raised bed, start with a complete drip irrigation starter kit if you want the fewest decisions. The better layout is two or three parallel runs of drip line down the bed, tied into a header at one end. Tomatoes and peppers get deep, steady water. Lettuce and greens avoid wet leaves. Mulch stays in place. Soil moisture becomes boring in the best way.
The spigot stack matters. Add a backflow preventer, a Y-filter for drip systems, and a pressure regulator before the tubing. Drip emitters are not designed for full household pressure, and tiny emitters clog without filtration. This is not the glamorous part of irrigation, but it is the part that keeps the system from failing.
Add a hose-end battery timer once the bed is planted. In spring, you may only need it occasionally. In summer, it keeps fruiting crops from swinging between drought and flood. Set it conservatively at first, then dig down with your fingers to check how deep the water actually moved. Surface moisture is not enough. For more layout detail, use the full drip irrigation guide.
If you want an easier but less precise option, a soaker hose can work in a single raised bed for a season or two. I still prefer real drip line because it lasts longer, waters more evenly, and is easier to repair. The important point is not the exact brand. The important point is that Zone 7 vegetables need consistent soil moisture through heat, flowering, and fruit fill.
4. Frost and season extension
Zone 7 gardeners get a long season because the shoulder seasons are usable. The trick is protecting plants during those annoying cold snaps that show up after everything looked safe.
A roll of Agribon AG-19 frost cloth or similar lightweight row cover is the one season-extension item I would buy immediately. It protects spring seedlings from light frost, reduces wind stress after transplanting, and keeps some insect pressure off young brassicas. It also lets you plant fall greens with more confidence. University extension guidance on row covers, such as this Utah State Extension overview, is worth reading because the material choice affects light, heat, and protection.
Use low tunnel hoops to hold the cloth above seedlings instead of letting it rub every leaf. Hoops turn frost cloth from a blanket into a little protected airspace. Secure the fabric with garden Velcro clips, spring clamps, or weights along the edge. The goal is not perfection. It is keeping wind from turning the cover into a sail at 2 a.m.
A small cold frame is optional for a first spring, but useful if you want fall and winter greens. In Zone 7, a cold frame can keep spinach, lettuce, mache, kale, and parsley harvestable much longer than an exposed bed. Vent it on sunny days. A closed cold frame can cook greens in February faster than cold can kill them.
Do not use frost protection to force tomatoes into cold soil. Use it to protect transplants during a surprise dip, to harden off seedlings, and to extend greens. There is a difference between gaining a week and fighting the season.
5. Hand tools that actually earn their place
You do not need a matching wall of tools. You need a few tools that feel good enough to use every week.
A hori hori knife is the first one I would buy. It plants transplants, cuts roots, opens bags, measures planting depth, digs weeds, divides perennials, and does half the jobs people buy three separate tools for. Keep it out of the dishwasher, wipe it dry, and it will last.
For pruning, buy better than the cheapest rack model. Felco pruners are the classic choice because they are repairable, comfortable, and hold an edge. Fiskars-style pruners are fine if that is the budget, but avoid dull bypass pruners that crush tomato stems and pepper branches. Clean pruners matter in humid Zone 7 gardens where disease can move plant to plant.
You still need a sturdy hand trowel and a hand cultivator. The trowel is for transplanting, scooping compost, and fixing irrigation lines. The cultivator is for loosening crusted soil, mixing amendments into the top inch, and pulling small weeds before they get roots under the bed frame.
Buy gloves you will actually wear. Nitrile-coated garden gloves are better for vegetable work than thick leather gloves because you can feel seedlings, clips, twine, and drip fittings. Keep leather gloves for roses, brambles, and moving rough material. For everyday bed work, thin gloves win.
A harvest container sounds optional until you are trying to carry cucumbers, basil, beans, and cherry tomatoes in your shirt. A harvest basket or garden colander earns its place in summer. You can rinse greens outside, bring tomatoes in without bruising them, and stop making five trips from the bed to the kitchen.
The tools I would skip at first: a broadfork unless you are building in-ground beds, a wheel hoe unless you are managing long rows, fancy dibbers, decorative seed boxes, moisture meters, and cheap pruning saws. Buy those later if your garden grows into them.
6. Pest and disease defense for the Southeast and Mid-Atlantic
Zone 7 covers a lot of country, but many Zone 7 vegetable gardens deal with the same pattern: humid spring, hot summer, caterpillars on brassicas, cucumber beetles on cucurbits, aphids on tender growth, fungal disease on crowded tomatoes, and slugs in damp shade. You do not need a chemical arsenal. You need a small, targeted kit and the habit of looking closely before treating.
For caterpillars on cabbage, kale, broccoli, collards, and cauliflower, Bt for caterpillars is the right first spray. Bt kurstaki targets caterpillars, which is why it is useful on brassicas and less disruptive than broad-spectrum insecticides. It breaks down in sunlight and washes off, so apply it in the evening and repeat after rain when damage is active.
For aphids, mites, and some soft-bodied pests, neem oil can help, but use it with restraint. Spray in the evening, avoid open flowers, and do not use oil on heat-stressed plants. Neem is not a personality trait. It is a tool for specific problems.
Diatomaceous earth belongs in the optional part of the pest kit. It can help in dry conditions around crawling pests, but it stops working when wet, and Zone 7 dew alone can make that a narrow window. Use it carefully and avoid dusting flowers where pollinators are working.
The stronger first line is physical exclusion. Insect netting over young brassicas and cucurbits prevents many problems before they begin. Remove covers from crops that need pollination when flowers open, or hand-pollinate if you are keeping covers in place. For the full pest decision tree, read the plain guide to garden pest management.
Disease prevention is mostly spacing, pruning, airflow, mulch, and water at the base. Do not crowd six tomatoes into one 4x8 bed and then blame the weather when leaves stay wet and disease moves fast. In humid Zone 7 gardens, boring spacing decisions are disease control.
Optional but worth it
A soil test kit is useful, but your county extension soil test is usually better. The home kit can help you learn the basics. The lab test gives you pH and nutrient recommendations you can actually act on. This matters in Zone 7 because clay, sandy soil, acidic woodland soil, and old suburban fill all behave differently. Before you add lime, sulfur, bone meal, or a bucket of fertilizer, test.
Composting is worth doing if you have space and patience. An outdoor compost tumbler is clean, contained, and easy for small yards, though it will not produce endless compost. A countertop electric composter is more of a kitchen waste reducer than a full compost system, but it can make sense for gardeners who cannot run an outdoor pile.
A garden journal or planner sounds quaint until you realize you will forget every important date. Write down when you started seeds, transplanted tomatoes, saw the first cucumber beetle, picked the first bean, and pulled the last pepper. Next year, that notebook is more useful than another packet of seeds.
The first-season buying order
If you are building this from zero, buy in this order.
First, the bed, kill layer, soil, compost, and thermometer. Second, seeds or starts plus the seed-starting setup if you are starting indoors. Third, irrigation before summer heat arrives. Fourth, frost cloth and hoops before the first spring or fall cold snap, not the night before. Fifth, hand tools. Sixth, pest controls only as the relevant pest pressure appears.
That order keeps the garden grounded. You are not buying products because they look useful in a cart. You are buying the pieces that solve the next real problem.
Bottom line
A productive Zone 7 vegetable garden does not require a huge budget or a perfect setup. It requires a good bed, honest timing, steady water, basic protection, and enough tools to work without fighting yourself. Start with one bed, plant reliable crops, keep records, and learn how your local spring and summer behave.
By year two, you will know what deserves more space. Maybe tomatoes and basil carry the garden. Maybe fall greens are the surprise winner. Maybe cucumbers are easy and squash is a pest magnet. That is the point of a first season. Build a simple system, harvest from it, and let the next version be based on what actually happened in your yard.